Sunday, 30 December 2012

Honeybear: January, Printable Freestanding Calendar

So here we are at the end of 2012. I hope you have had a lovely holiday break. I've been using the down time to get on with lots of little creative projects, including this one for a printable calendar buddy. This little guy is the 'Honey Bear', part bumble bee part grizzly bear! I wanted to call these calendars 'Cutants' but Polly Pocket has already beaten me to that name, darn it! That's the idea though, cute mutants. Each month there will be a new Cutant to keep you company while you work. You can create a little desk top zoo or recycle at the end of each month.

Download the 'Honey Bear' calendar here... 

1. You don't need much to make the Honey Bear,  just some thick paper/card, a little ruler, some scissors and double sided tape or glue. Firstly download and print out the design.


2. Roughly cut around the outline.

3. Use the back edge of the scissors and a ruler to score along the grey fold lines. Be careful not to score through the ears!
4. Using a small sharp pair of scissors cut along the black dotted line. Go slowly when cutting around the ears and wings, these are a little tricky.
5. Once you've cut the Honey Bear out fold along the scored grey lines.

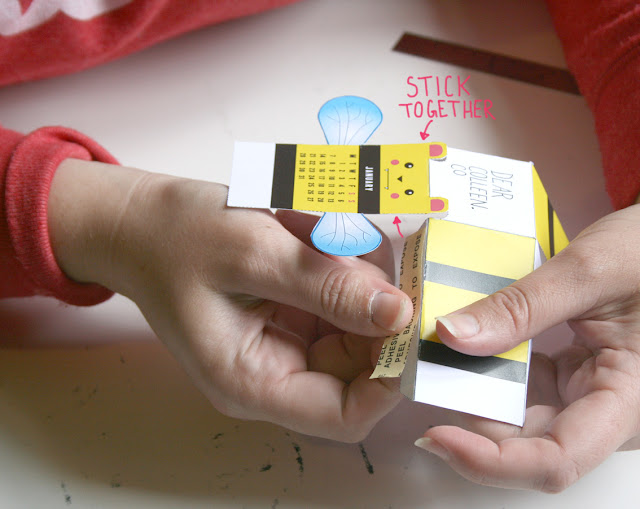
 6. Put double sided tape or glue on the top side of each flap. Stick the flaps to the body, so the flaps stick behind the adjacent part of the body.

7. Stand on your desk and enjoy.

Wednesday, 19 December 2012

Free Printable Gandalf Swag!

Goodness I think I've just shipped my final parcel for 2012. My plan is to stay open over Christmas and I'll send any really last minute orders tomorrow but I can't imagine anyone doing more online Christmas shopping at this point. All orders from Saturday on will be shipped on 3 January.
Anyway, so, Gandalf. I live in New Zealand where a lot of 'The Hobbit' has been filmed and I think it's fair to say it's been Hobbit fever in these here parts. I did this silly sketch in my notebook and it was quite popular. I have no plans to do anything commercials with it so I decided to put it up as another freebie. The download includes two A6 (148mm-105mm) Christmas card to fit a C6 envelope (once folded. Or four mini folding cards to use as swing tags on gifts. I know it's a little last minute but I also know not everyone has done their wrapping yet. Side note chooce a nice paper around 210gsm-280gsm it will make all the difference. Download here... 
I hopefully have one more download to share, but if I don't get round to it thank you for taking the time to check out my blog. I wish you all a Happy Christmas. 

Also if anyones actually using these I would so love to see pics, you can find me on facebook and twitter:)

Monday, 17 December 2012

DIY Human Centipede Bunting!

Ever wondered how Dr Heiter from the Human Centipede movie decorates his home at Christmas? Yes? Me too!
Although the Doctor is a master Surgeon by profession his real strength lies in the arts and crafts. Where his drawing skills may be lacking though, he, as you know is quite resourceful and very into DIY. So here we can unveil his latest creation just in time for the holiday season, Human Centipede Bunting! A festive addition to any fireplace or to hang ass-to-mouth across the living room as you open presents on Christmas morning.  
STEPS 
1. Download the design here! Print it out on to some heavy weight paper/card, you might want to check your printer guidelines but 210-280 gsm should be fine. Print out as many as you need for the length you desire. There are six 'humans' per page.
2. Cut out each 'human' around the black broken key line. As these will be hung it is probably not necessary to be terribly neat with the cutting out.
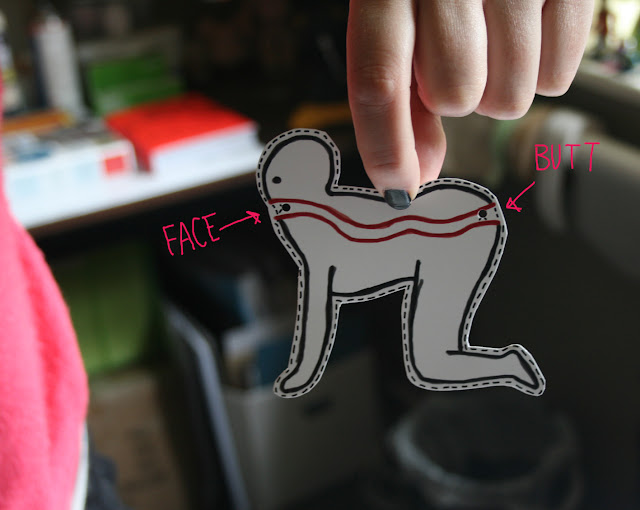
3. On each, use a small hole punch to make one hole in the mouth and one in the butt of the 'human'. Use the x's as guide for where to punch. If you don't have a small hole punch you can just leave it 'as is' for the moment. 

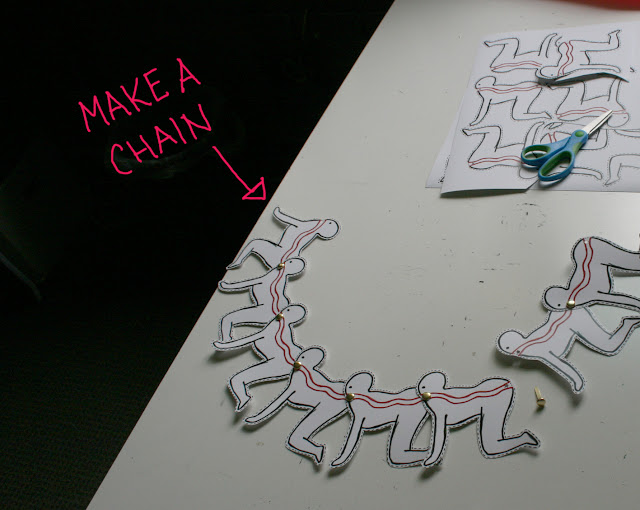
4. Once you have two 'humans' cut out you can begin pinning them together. Place the mouth hole of one over the top of the butt hole of another (so the face is visible). Push a paper fastener through the lined up holes and flair out the end once it is through. Repeat this step for as many 'humans' you wish to centipede. If you do not have a small hole punch you can probably just push the tack through the card or make a very small incision first which goes through both.
5. To hang, you have a few options. The cleanest would be to tie cord through the mouth and through the butt at each end and pin on the wall in place. Alternatively use a low tack masking tape or a washi tape and adhere to the wall. Bluetac would work too but it does tend to rip wall paper. 


Dr Heiter wishes you all a very merry Christmas. He unfortunately will be spending it alone in the lab but hopes to 'join' you soon.  


Sunday, 16 December 2012

Free Printable Grumpy Cat Swag!

Firstly some house keeping if you're in New Zealand and you want a 2013 Seasons Eating Calendar you have until end of tomorrow to order. They will not be available at all past this point.

Anyway enough of the boring stuff, I know you're only here for some cool grumpy cat printables! Like my bookmarks these are totally free. The cards and tags are designed for grumpy cat fans (but come on who's not :). They are ideal for your less than enthused friends and family. Everyone knows someone who's not a big Christmas lover.... I'm looking at you Dad!
These printables are so simple they don't have any DIY instructions, apart from a couple of arrows built into the design. I would personally choose a nice matte paper around 210gsm-280gsm. The Christmas card is A6 (148mm-105mm) once folded and should fit a C6 envelope. You can download the card here...
As you can see from the picture above I used my much loved rounded corner punch on the grumpy cat tags. There is no need to worry about this unless you're feeling fancy. I tied them onto the gift using Devine twine, I bought mine from Tea Pea but I think Wanda Harland also has some. You can download the tags here...

A little side note that the design of this has ended up looking like my friend Evie Kemps work, it's not copied in anyway but there is a clear style cross over. She's been a sweetie and has OKed me posting this however if you like this design you should check out her shop for a lot more awesome cat, dogs and other fierce beasts:)

Thursday, 13 December 2012

Free Printable Bookmarks

This is a very simple DIY, it’s so simple it’s really just a printable, with a brief 'how to'. 

I know lots of people give books at Christmas. When I gift a book, instead of writing or sticking anything on the inside cover I like to add a bookmark with a note (something about defacing books, even though it’s nice it just doesn’t sit well with me). Bookmarks are handy and a thoughtful extra. When I send orders I try and add little gifts in with the parcel and bookmarks are one of my staples. I have a number of design but my two newest are my favorites so as a nice seasonal gesture I’m offering the designs as printables.
The first design is a silly word play joke, like all jokes it won’t be for everyone but it made me giggle so I figured at least a couple of people might like it as well. It’s a Facebook(Mark), basically a bookmark with a picture of Mark Zuckerberg the CEO of Facebook on it. Yeah I know it’s a bit of a Dad joke but if you like it you can download it here...

The second design is this sweet little carrot with a green ribbon stalk. It was design to send out with my Seasons Eatings calendars and would be a perfect little extra for any green fingered friends or family. The way the top pops out looks like it’s growing from the book. It’s so sweet. You can download this design here...

WHAT YOU NEED

STEPS 
Download the design and print it out on to some heavy weight paper/card, you might want to check your printer guidelines but 250-280 gsm should be fine. You can pick this up from any good stationary shop.


Cut out the bookmark using the black key line. Try and carefully cut just inside the line so you don’t have any black border on the bookmark.


Optional, if you’re feeling fancy you can use a rounded corner punch to make the corners rounded. You can buy them in good stationary shop too or from amazon.

Use a hole punch to make a hole in the top centre of the bookmark. Make sure it doesn’t end up so high that you cut through the top of the paper. I have a small one hole hand punch but a single hole from a double standard hole punch will do just as well. Note, measure the size of the hole your hole punch makes before buying ribbon. Ribbon comes in different widths. I bought 3mm wide ribbon as my punch makes small holes. You may need 5mm or 8mm with a standard larger punch.
Once you have the right width of ribbon cut a length of around 10cm. Use green ribbon to make the stalk of the carrot and what ever colour you like on the Facebook(mark).

Fold the cut ribbon in half and push the folded point through the hole at the top of the bookmark.
 Once the ribbon is half way through the hole, open the folded half out to form a loop.
 Place the open ends over the top of the bookmark and thread them through the loop.
Pull the open ends tight... Bookmark made, write a message on the back or just use yourself for fun.